
LINE
Create a series of straight-line segments (Close, Undo; Enter continues the last line or arc).
- Type
- LINE or L
- On the ribbon
- Home › Draw › Line
- Since
- Musa CAD 0.1.0
What it asks first
Command: LINESpecify first point:Read from Musa CAD 0.8.0 itself (musacad --dump-wiki-data), so these facts always match the release this wiki is built for (0.8.0).
LINE draws straight lines. Each segment starts where the last one ended, so you can draw a whole outline without stopping. Each segment is a separate line object.
How it works
Section titled “How it works”Type L and press Enter. Give the first point, then keep giving points. Press Enter when you are done.
Command: LSpecify first point: 0,0Specify next point or [Undo]: @100,0Specify next point or [Undo]: @0,60Specify next point or [Close/Undo]: @-100,0Specify next point or [Close/Undo]: C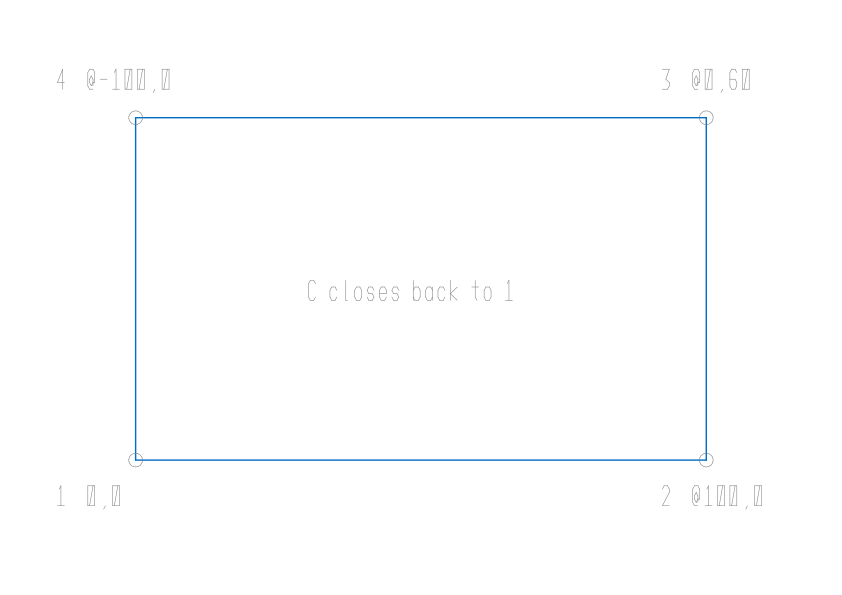
Options
Section titled “Options”| Option | What it does |
|---|---|
Undo (U) | Removes the last segment and goes back to the point before it. With no segments left, it forgets the first point and asks for it again. |
Close (C) | Draws a segment back to the first point and ends the command. It appears once you have drawn two segments. |
| Enter at Specify first point | Continues from the end of the last line or arc you drew. After an arc, the new line runs on along the arc’s direction and Musa CAD asks only Specify length of line:. |
| Enter at Specify next point | Ends the command. |
Giving exact points
Section titled “Giving exact points”Every point prompt accepts the same kinds of input:
| You type | Meaning |
|---|---|
40,25 | The point at X 40, Y 25. |
@100,0 | 100 to the right of the last point, 0 up. |
@50<30 | 50 away from the last point, at 30 degrees. |
50 | 50 along the direction the cursor is pointing. Good with Ortho or Polar tracking on. |
@ | The last point itself. |
You can also click, and snap to objects. After a typed point, Musa CAD repeats the point it understood on the next line, so you can check it.
With Dynamic Input on, boxes for the length and angle appear beside the cursor. Type the length, press Tab, type the angle, and press Enter.
Good to know
Section titled “Good to know”- Each segment is its own object. To make one object of connected segments, draw with PLINE instead, or join the lines afterwards with JOIN.
- A length of 0, or a negative length at Specify length of line, is refused with
Value must be positive and nonzero. - If LIMITS checking is on, a point outside the limits is refused with
**Outside limits. - Esc ends the command. The segments you already drew stay.
Compared with AutoCAD
Section titled “Compared with AutoCAD”LINE works the way AutoCAD users expect: the same prompts, Close and Undo, and Enter to continue from the last line or arc.
- Draw lines and arcs as one object with PLINE.
- Cut lines back to an edge with TRIM.
- Learn every way to place points exactly in Precision and drafting aids.