
A tour of the interface
This page names the parts of the Musa CAD window, so the rest of the wiki makes sense. The layout and the names are the same as AutoCAD’s “Drafting & Annotation” workspace, so if you know AutoCAD you can skim it.
The ribbon
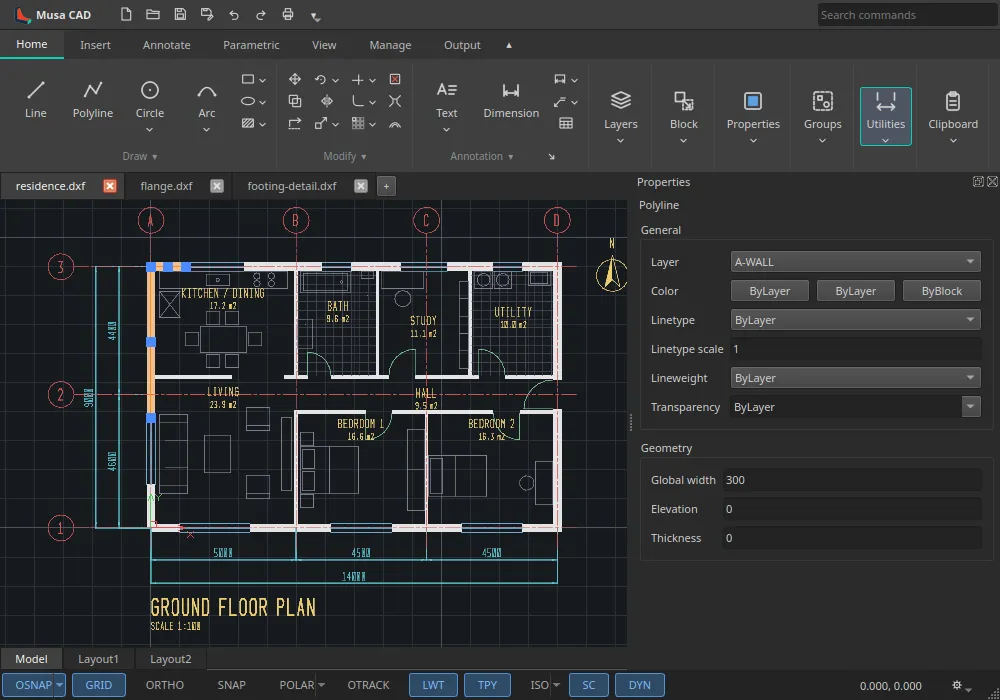
Section titled “The ribbon”The ribbon is the strip of buttons across the top. It has seven tabs: Home, Insert, Annotate, Parametric, View, Manage and Output. Each tab is split into panels. The Home tab, for example, has the Draw, Modify, Annotation, Layers, Block, Properties, Groups, Utilities and Clipboard panels.
A few things worth knowing:
- Hover over any button to see the command’s name, its short alias and what it does.
- A small arrow under a button opens more ways to use it. Circle, for instance, has six ways to draw a circle.
- A small arrow in a panel’s corner opens the matching window, such as the Dimension Style Manager.
- A greyed-out button is a tool Musa CAD does not have yet. Its tooltip says so. The whole Parametric tab is like that in version 0.8.0.
When the window gets narrow, the panels shrink to icons so everything still fits. Extra tabs appear while you work on a hatch, a text, a block or in the Block Editor.
The application menu and the Quick Access Toolbar
Section titled “The application menu and the Quick Access Toolbar”Click the Musa CAD logo at the top left for the application menu: New, Open, Save, Save As, Import, Export, Plot, DWG Setup, Options, Check for Updates, Save Bug Report, About and Exit.
Next to it is the Quick Access Toolbar with New, Open, Save, Save As, Undo, Redo and Plot. Its small drop-down arrow lets you add more buttons, or move the toolbar below the ribbon.
Drawing tabs
Section titled “Drawing tabs”You can have several drawings open at once. Each one gets a tab above the drawing area. Ctrl+Tab moves to the next tab, and Ctrl+W closes the current one. Each drawing keeps its own view, selection and undo history. You can copy objects from one drawing and paste them into another.
Typing commands: Dynamic Input
Section titled “Typing commands: Dynamic Input”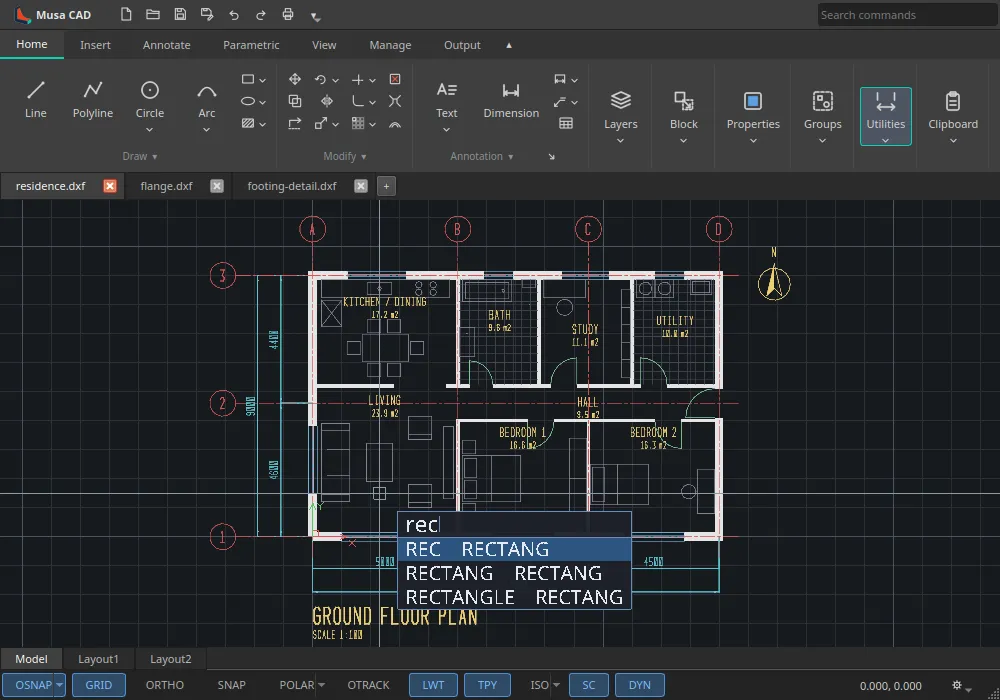
This is the part of Musa CAD you will use most, and it is switched on from the start. You never need to click into a command line. Just start typing on the drawing:
- The command you type appears next to the cursor, with a list of matching commands and what each one does. Press Enter to run it.
- Musa CAD’s question, the prompt, also appears next to the cursor, for example
Specify next point or [Close/Undo]:. - At a prompt with options, press ↓ (the down arrow) to see the options as a list, and pick one.
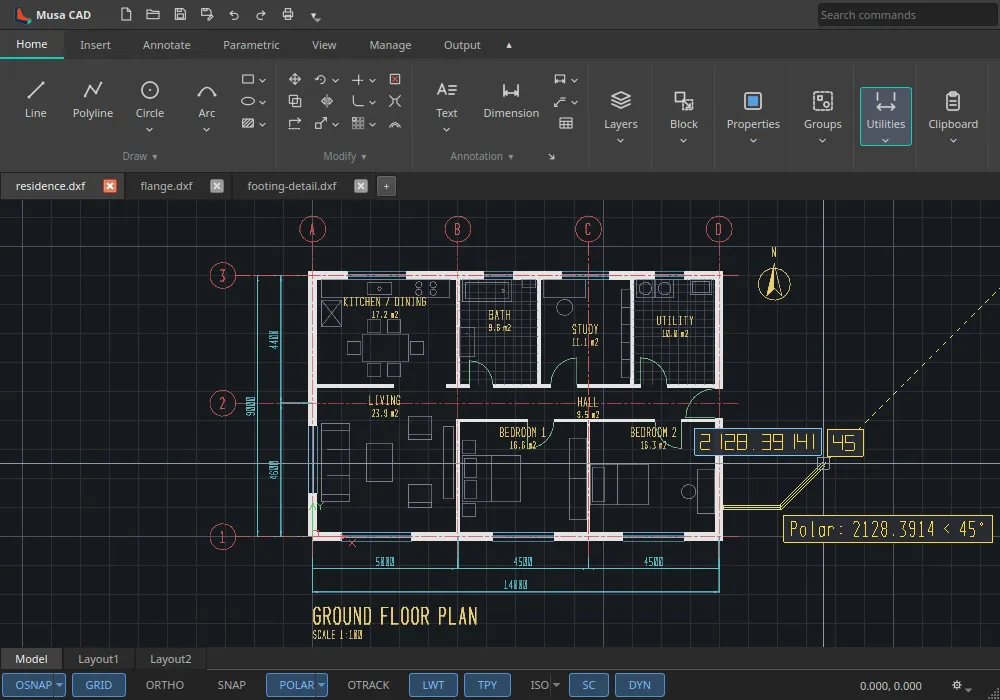
- While you draw, the length and angle of what you are drawing appear in small boxes. Type a number into them to make it exact. Tab moves between the boxes.
Prefer the classic command line at the bottom of the window? Press F12. The prompts and commands are exactly the same either way. Read more about Dynamic Input.
Typing rules (the same as AutoCAD)
Section titled “Typing rules (the same as AutoCAD)”- Type a command’s full name or its alias:
LINEorL. - Choose an option by typing its capital letters:
Cfor Close,Ufor Undo. - Enter or Space confirms. Esc cancels.
- Enter when no command is running repeats the last command.
- ↑ and ↓ step through the commands you typed before (at the command line).
The status bar
Section titled “The status bar”Along the bottom of the window are the drawing aids. Click one to switch it on or off, or press its key:
| Button | Key | What it does |
|---|---|---|
| OSNAP | F3 | Snaps the cursor to exact points on objects, such as ends, middles and centres |
| 3DOSNAP | F4 | 3D object snap. It exists to match AutoCAD; a 2D drawing has nothing for it to snap to |
| DUCS | F6 | Dynamic UCS. Also only there to match AutoCAD |
| GRID | F7 | Shows the background grid |
| ORTHO | F8 | Keeps lines horizontal or vertical |
| SNAP | F9 | Makes the cursor jump in fixed steps along the grid |
| POLAR | F10 | Guides the cursor along set angles, such as every 45° |
| OTRACK | F11 | Guides the cursor along lines through snap points |
| DYN | F12 | Dynamic Input: typing at the cursor |
When a new version is out, a small notice appears at the right of the status bar. Click it to see how to update.
The Properties palette
Section titled “The Properties palette”Type PR (or click Properties on the View tab’s Palettes panel) to open the Properties palette on the right. It shows the selected objects’ layer, colour, linetype, lineweight, transparency and size, and you can change any of them there. If you select several objects and a value differs between them, it shows VARIES.
Layers
Section titled “Layers”On the Home tab, the Layers panel has a drop-down showing the current layer. Click the small icons next to a layer’s name to turn it on or off, freeze or thaw it, or lock or unlock it, without closing the list. Type LA to open the full Layer Properties Manager.
The right-click menu
Section titled “The right-click menu”Right-click on an empty part of the drawing, with no command running, for quick actions: Repeat the last command, Recent Input, Clipboard, Isolate, Erase, Select Similar, Quick Select, Deselect All, Undo, Redo and Properties.
Make it yours
Section titled “Make it yours”- Your own keyboard shortcuts: type
CUI(Manage tab ▸ Customization panel). - Your own command aliases: type
ALIASEDIT. It can also read an AutoCADacad.pgpfile, so you can bring your aliases with you. - Show or hide ribbon tabs and panels: right-click the ribbon.
You know your way around. Try Dynamic Input in more depth, or read Coming from AutoCAD if you are switching.